Direct Answer: To install a roof rack, identify your vehicle’s mounting points (factory rails, fixed points, or a bare roof), attach the rack’s foot brackets at the correct spacing per the manufacturer’s fit guide, torque all bolts to spec, and test for lateral movement before loading any cargo, bikes, or a rooftop tent.
Introduction
A roof rack opens up serious cargo capacity, but knowing how to install a roof rack correctly is what separates a solid, quiet setup from one that whistles at highway speed or, worse, shifts under load. Whether you’re mounting a Thule system on a car with factory rails, figuring out how to install a roof rack on a car without rails, or working out how to mount a roof rack on a truck bed, the core principles are the same: correct mounting points, proper torque, and a load test before you trust it with anything valuable. Get any one of those wrong and you risk wind noise at best, or a dropped rooftop tent at highway speed at worst.
Why does this problem happen?
Most roof rack installation issues come down to a handful of avoidable mistakes:
- Wrong foot bracket spacing. Every vehicle has specific mounting point measurements, and using a universal setup without matching the fit guide leads to loose contact points.
- Under-torqued bolts. Roof rack hardware needs to be tightened to a specific torque spec. Too loose and the rack shifts under load; too tight and you can crack composite roof rails.
- Missing crossbar-to-foot compatibility. Mixing rack brands or using aftermarket crossbars not rated for your specific foot pack causes uneven weight distribution.
- No rails, no plan. Vehicles without factory rails need a fixed-point or track-mount system, and trying to force a rail-style rack onto a railless roof is a common, costly mistake.
- Ignoring roof weight ratings. Every vehicle has a static roof load limit, and stacking a cargo carrier, bikes, or a roof top tent without checking that number risks structural damage.
- Poor accessory-specific mounting. Bike racks, cargo carriers, and rooftop tents each clamp onto the crossbar differently, and using the wrong clamp width or orientation leads to a wobble that only shows up at speed.
What early warning signs appear before full failure?
Before a rack fails outright, it usually gives you a warning:
- A humming or whistling sound at highway speed that wasn’t there before installation.
- Visible gap or rocking motion when you push down on one end of the crossbar by hand.
- Bolts that appear to have backed out slightly after the first few drives.
- A cargo carrier or bike rack that shifts side to side when you turn sharply.
- Scratches or wear marks on the roof near the foot pack, suggesting micro-movement under load.
How to diagnose and fix this problem step-by-step?
Tools Needed:
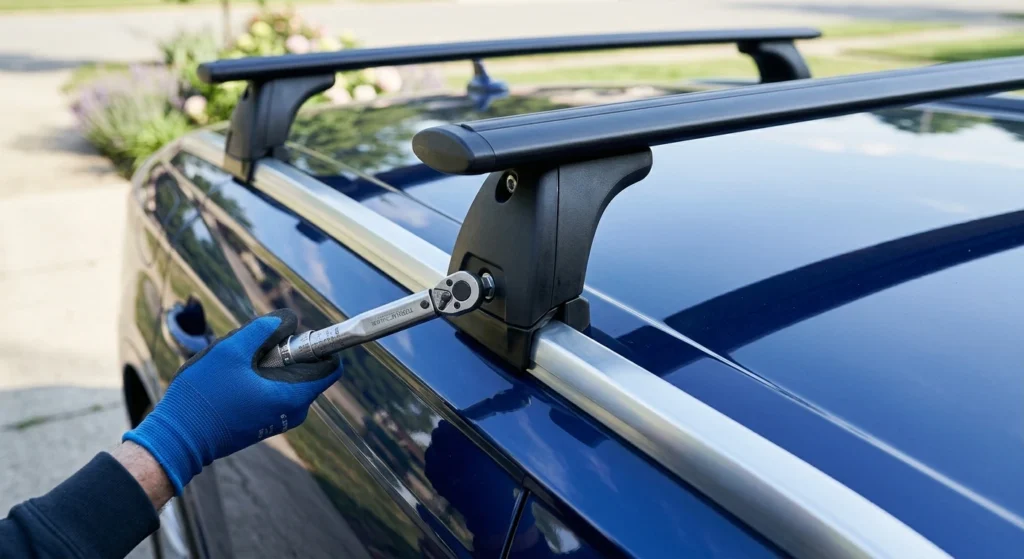
- Torque wrench (matched to manufacturer spec, usually 4-6 Nm range for most systems)
- Tape measure
- Manufacturer fit guide or app (Thule, Yakima, etc. all publish vehicle-specific fit charts)
- Microfiber cloth for roof surface prep
- Rubbing alcohol (to clean mounting surface before installation)
Chronological Fix Guide:
- Confirm your mounting type first. Check whether your roof has raised rails, flush rails, fixed points, or no rails at all. This determines whether you need a rail-style, fixed-point, or track-mount foot pack, and it’s the single most important step in how to install roof rack on car without rails setups specifically.
- Clean the mounting surface. Wipe down the roof or rail area with rubbing alcohol to remove wax or grime that could prevent a snug fit.
- Measure and space the foot brackets. Use the manufacturer’s fit guide to set exact spacing; this matters most in how to mount thule roof rack installs, since Thule’s foot packs are vehicle-specific down to the millimeter.
- Attach and hand-tighten first. Get all feet loosely in place before fully tightening any single one, so you can adjust alignment across the full length of the crossbar.
- Torque to manufacturer spec. Use a torque wrench, not a guess, to tighten each mounting point evenly in a cross pattern, similar to tightening lug nuts.
- Load test before real use. Push down and side-to-side on each end of the crossbar to confirm zero movement before mounting any accessory.
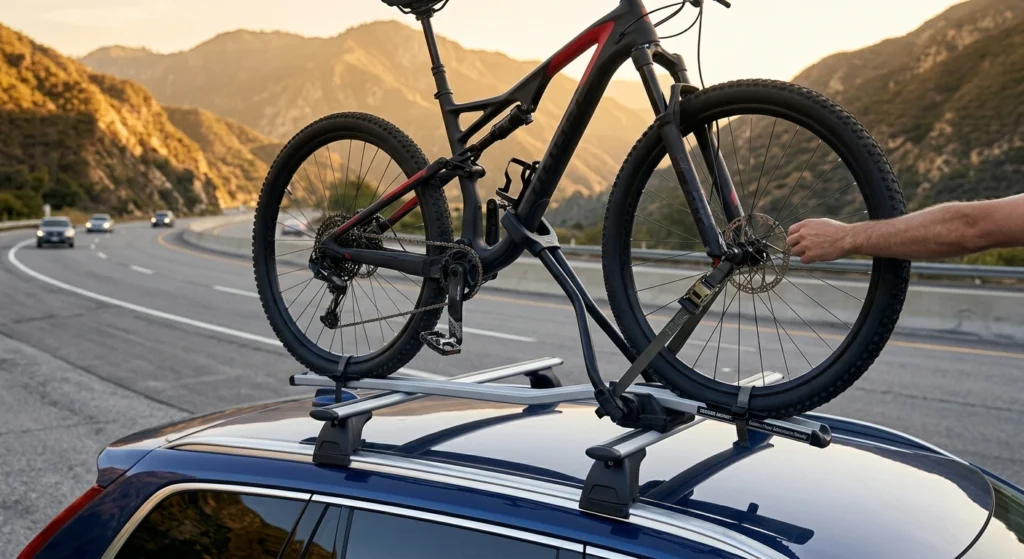
- Attach your accessory correctly. For how to put a bike on roof rack setups, center the wheel clamp and hand-check the quick-release skewer or thru-axle adapter twice. For how to attach roof top cargo carrier installs, make sure the U-bolts or clamps wrap fully around the crossbar, not just the edge. For how to mount roof top tent installs, confirm your roof’s static weight rating supports both the tent and expected occupant weight before your first trip.
Expert’s Note: Real-World Testing & Diagnostic Insight
A customer came in after hearing a loud whistle at highway speed following a DIY roof rack install. On inspection, the foot brackets were spaced correctly, but one bolt had never been torqued past hand-tight, leaving a hairline gap that turned into a wind tunnel at 65 mph. We re-torqued the full set to spec in a cross pattern and the noise disappeared entirely on the test drive. The lesson: even a properly positioned rack will fail if torque isn’t checked methodically, bolt by bolt, rather than tightened by feel.
How to prevent this issue from happening again?
- Re-check torque after the first 50 miles. New installations can settle slightly, so a follow-up torque check catches any bolts that loosened early.
- Clean the mounting surface every season. Road grime and salt buildup around the foot pack can accelerate wear on both the rack and the roof finish.
- Store crossbars properly when not in use. Leaving accessories mounted year-round adds unnecessary wear and wind drag; remove bike racks and cargo carriers between trips.
- Inspect rubber gaskets and pads regularly. These protect your roof finish and lose grip over time from UV exposure, similar to how sun damages other rubber car components.
- Never exceed the dynamic or static weight rating. Dynamic rating applies while driving; static applies when parked, like with a rooftop tent, and mixing these up is a common overload mistake.
FAQ
How do I install a roof rack on a car without rails?
You’ll need a fixed-point or track-mount foot pack rather than a rail-style system, since railless roofs rely on factory-designated anchor points hidden under small covers. Check your owner’s manual or the rack manufacturer’s fit guide to locate these points precisely. Installation follows the same torque and spacing principles as rail-equipped vehicles.
How do you attach a roof top cargo carrier securely?
Center the carrier over your crossbars, then secure it using the included U-bolts or clamps, making sure each one fully wraps the bar rather than just resting on top. Tighten evenly on both sides before adding any cargo. Always recheck the straps or clamps after the first 20-30 minutes of driving, since carriers can settle slightly.
Can I mount a roof rack on a truck the same way as a car?
Mostly yes, but how to mount a roof rack on a truck often involves bed-mounted or cab-to-bed track systems in addition to, or instead of, roof-line mounting. Check whether your truck’s rack is designed for the cab roof, the bed rails, or both, since hardware and spacing differ between these mounting zones. Following the manufacturer’s truck-specific fit guide avoids mismatched hardware.
Conclusion
Learning how to install a roof rack properly comes down to matching the right mounting system to your vehicle, torquing every bolt to spec, and load-testing before you trust it with cargo, bikes, or a tent. Take the extra few minutes to check spacing and torque correctly, and you’ll get a quiet, secure setup that holds up trip after trip. A careful install now means safer hauling and one less thing to worry about on the road ahead.