Cost To Fix Headliner: Sagging Headliner Causes, DIY Fixes, and Real Prices
Direct Answer: Cost to fix headliner sagging ranges from $10–$40 for a DIY repair kit, to 150–400 for a professional re-glue job, and up to $250–$600 for a full headliner replacement at a shop. Price depends on how far the fabric has separated and whether the foam backing has degraded beyond saving.
A sagging headliner is one of those problems that starts small — a corner peeling near the sun visor, a soft dip forming over the back seat — and gets worse fast once it starts. It’s not dangerous like a wiring fault or a mechanical failure, but it’s genuinely annoying, and it makes an otherwise clean interior look neglected. Understanding the real cost to fix a sagging headliner, and what’s actually happening behind that fabric, helps you decide whether this is a weekend DIY job or one worth handing to a shop.
Why does this problem happen?
A sagging headliner comes down to basic material breakdown, not anything electrical or mechanical:
- Adhesive failure from heat cycling. The headliner fabric is glued to a foam-backed board, and years of hot-cold cycling inside a parked car breaks down that adhesive bond, especially in direct sun.
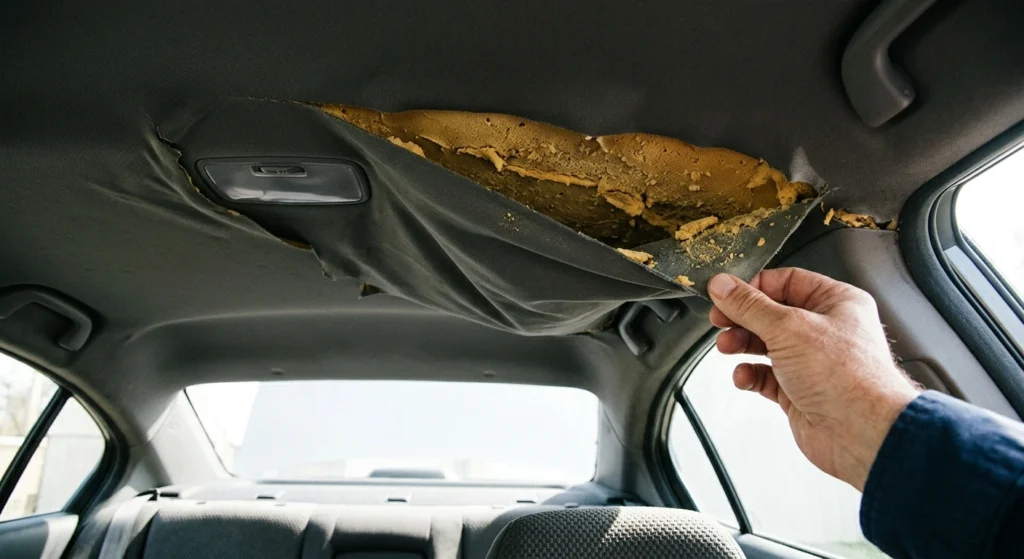
- Foam backing disintegration. Older headliners use a foam layer between the fabric and the board. That foam breaks down chemically over time (sometimes called “foam rot”), and once it crumbles, the glue has nothing solid to hold onto even if it’s technically still sticky.
- Humidity and moisture exposure. Cars parked in humid climates, or ones with a history of water leaks around the sunroof or door seals, see accelerated adhesive breakdown from repeated moisture exposure.
- UV exposure through the windshield and windows. Sunlight degrades both the fabric and the adhesive over years of parking outside, which is why sagging is more common in hot, sunny climates.
- Age alone. Most headliners are rated to last well over a decade, but by 15-plus years, adhesive breakdown is common even on a well-maintained car.
What early warning signs appear before full failure?
- A small corner or edge starting to peel away near the sun visor, dome light, or grab handles
- A slight sag or dip forming in the middle of a panel, without full separation yet
- The fabric feeling loose or floppy when lightly pressed, even if it still looks attached
- A faint crackling sound when you touch the ceiling, which often means the foam backing underneath has started crumbling
These are the early stages of how to fix a sagging headliner before it becomes a full-panel problem — catching it here usually means a cheaper, simpler repair than waiting for it to fully detach.
How to diagnose and fix this problem step-by-step?
Tools Needed:
- Fabric-safe spray adhesive or headliner adhesive spray (mandatory for DIY repair)
- Straight pins or T-pins (mandatory, used to hold fabric in place while glue sets)
- Small paint roller or clean cloth (mandatory, for pressing fabric flat and smooth)
- Microfiber cloth and mild cleaner (mandatory, for prepping the surface)
- Heat gun on low setting (optional, helps reactivate stubborn adhesive in cold climates)
- Full headliner replacement kit (only needed if the sag covers most of the panel)
Chronological Fix Guide:
- Identify how much of the headliner is actually sagging. A small corner or edge is DIY-friendly. If more than a third of a panel has separated, or the foam backing is crumbling badly, replacement is usually more practical than repair.
- Clean the fabric and the board underneath. Wipe both surfaces with a mild cleaner and let them dry fully — glue won’t bond properly to a dusty or oily surface.
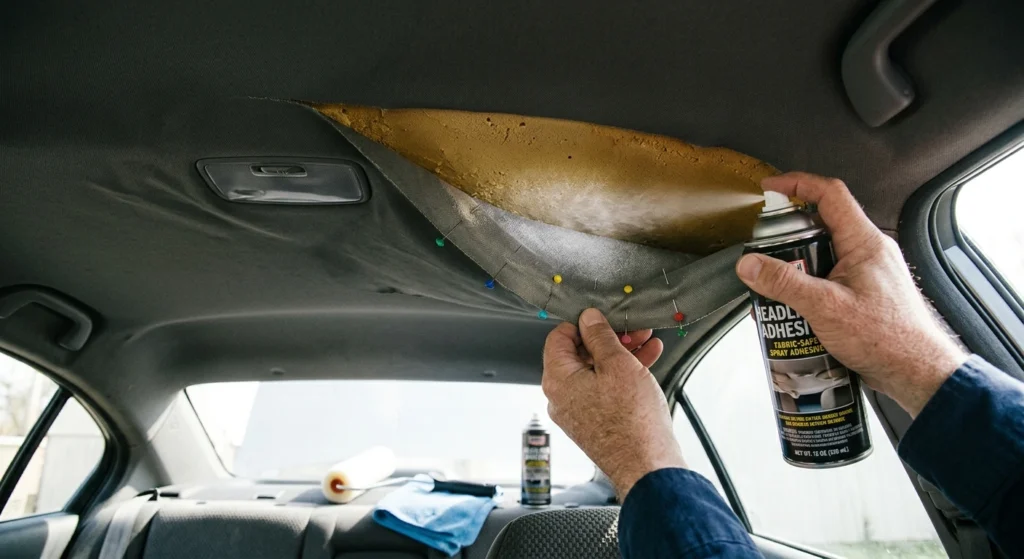
- Apply adhesive to both the fabric and the board. Spray a thin, even coat on both surfaces rather than soaking one side, which helps the bond hold evenly without leaving stiff, glue-soaked patches.
- Press the fabric back into place from the center outward. Working from the middle prevents air bubbles or wrinkles from getting trapped underneath.
- Pin the fabric in place while the glue sets. Push straight pins through the fabric into the foam board at the repaired section to hold tension evenly while curing.
- Let it cure fully before removing pins. Most adhesives need at least a few hours, sometimes overnight, before the bond is strong enough to hold on its own.
- Check for any remaining loose spots and repeat as needed. It’s common to find a second small area nearby once the main sag is addressed, especially on an older headliner.
Expert’s Note: Real-World Testing & Diagnostic Insight
A 2008 Honda Accord came in with a headliner sagging noticeably over the back seat, with the fabric fully detached in a section about a foot wide near the rear dome light.
We pressed on the surrounding fabric first to check how far the separation extended — it was contained to that one section, with the rest of the headliner still firmly bonded. Rather than jumping to full replacement, we cleaned both surfaces, applied headliner adhesive spray to the fabric and the board, and pinned it in place overnight to cure evenly. The next day, the section held firm with no visible wrinkling or bubbling. Total cost was under $30 in materials, compared to the $300-plus quote the owner had gotten for full headliner replacement elsewhere — proof that a contained sag doesn’t always need the expensive fix.
How to prevent this issue from happening again?
- Use a windshield sunshade when parking outside. Reducing direct UV and heat buildup inside the cabin slows adhesive breakdown significantly.
- Address small leaks around the sunroof or door seals promptly. Moisture exposure is one of the more preventable causes of accelerated headliner sagging.
- Avoid pressing or pulling on the headliner unnecessarily. Constant contact, especially near edges, stresses an aging adhesive bond faster than normal wear alone.
- Park in shade or a garage when possible, especially in hot climates. This is the single biggest factor in headliner longevity, since heat cycling is the main driver of adhesive failure.
- Clean the headliner gently and avoid harsh chemical cleaners. Some solvents can actually weaken the adhesive bond further, so stick to mild, fabric-safe cleaners.
FAQ
Cost to fix a sagging headliner at a professional shop usually falls between $150 and $400 for a re-glue repair, or $250 to $600 for full headliner replacement if the damage is extensive. The price depends mainly on labor time, since removing and reinstalling a headliner panel involves taking down trim pieces, visors, and grab handles first. Getting a quote that specifies repair versus full replacement helps you compare options accurately, since the two are very different jobs.
The key to a clean DIY result is working from the center of the sagging area outward when pressing the fabric back down, which prevents wrinkles or air bubbles from getting trapped. Using pins to hold tension evenly while the adhesive cures, rather than just pressing and hoping it holds, makes a big difference in how smooth the final result looks. Taking your time with the adhesive application — thin, even coats rather than a heavy soak — also avoids stiff or glue-soaked patches that stand out once dry.
It’s primarily cosmetic and won’t affect how the car drives, but it does tend to get worse rather than staying the same. Once adhesive starts failing in one spot, the surrounding fabric loses some of its support too, so a small corner peel often spreads to a larger sag over months if left unaddressed. Catching it early, while it’s still a small section, is what keeps the repair simple and cheap rather than needing a full headliner replacement later.
Conclusion
A sagging headliner looks worse than it usually is — in most cases, it’s a straightforward adhesive failure that a DIY repair kit can fix in an afternoon, well before it justifies the cost of full replacement. Catching it early, while the separation is still small, keeps your options open and your repair bill low. With the fabric reattached properly and a little sun protection going forward, your headliner should hold up for years without sagging again.